Get started with Android Studio
Android Studio is Google's officially supported IDE for developing Android apps. This IDE is based on IntelliJ IDEA, which offers a powerful code editor and developer tools. Android Studio 3.2.1 includes the following features:
- A flexible Gradle-based build system
- A fast and feature-rich emulator
- A unified environment where you can develop for all Android devices
- Instant Run to push changes to your running app without building a new APK
- Code templates and GitHub integration to help you build common app features and import sample code
- Extensive testing tools and frameworks
- Lint tools to help you catch performance, usability, version compatibility, and other problems
- C++ and NDK support
- Built-in support for Google Cloud Platform, making it easy to integrate Google Cloud Messaging and Google App Engine
- Plugin architecture for extending Android Studio via plugins
Download Android Studio
Google provides Android Studio for the Windows, Mac OS X, and Linux platforms. You can download Android Studio from the Android Studio homepage, where you'll also find the traditional SDKs with Android Studio's command-line tools. Before downloading Android Studio, make sure your platform meets the following requirements:
Windows requirements
- Microsoft Windows 7/8/10 (32-bit or 64-bit)
- 3 GB RAM minimum, 8 GB RAM recommended (plus 1 GB for the Android Emulator)
- 2 GB of available disk space minimum, 4 GB recommended (500 MB for IDE plus 1.5 GB for Android SDK and emulator system image)
- 1280 x 800 minimum screen resolution
Mac OS requirements
- Mac OS X 10.10 (Yosemite) or higher, up to 10.13 (High Sierra)
- 3 GB RAM minimum, 8 GB RAM recommended (plus 1 GB for the Android Emulator)
- 2 GB of available disk space minimum, 4 GB recommended (500 MB for IDE plus 1.5 GB for Android SDK and emulator system image)
- 1280 x 800 minimum screen resolution
Linux OS requirements
- GNOME or KDE desktop. Tested on Ubuntu 14.04 LTS, Trusty Tahr (64-bit distribution capable of running 32-bit applications)
- 64-bit distribution capable of running 32-bit applications
- GNU C Library (glibc) 2.19 or later
- 3 GB RAM minimum, 8 GB RAM recommended (plus 1 GB for the Android Emulator)
- 2 GB of available disk space minimum, 4 GB recommended (500 MB for IDE plus 1.5 GB for Android SDK and emulator system image)
- 1280 x 800 minimum screen resolution
Once you've ensured that your operating system is compatible with Android Studio 3.2.1 or higher, download the appropriate Android Studio distribution file. The Android Studio download page auto-detected that I'm running a 64-bit Windows operating system and selected android-studio-ide-181.5056338-windows.exe (927 MB) for me to download.
Installing Android Studio on 64-bit Windows 10
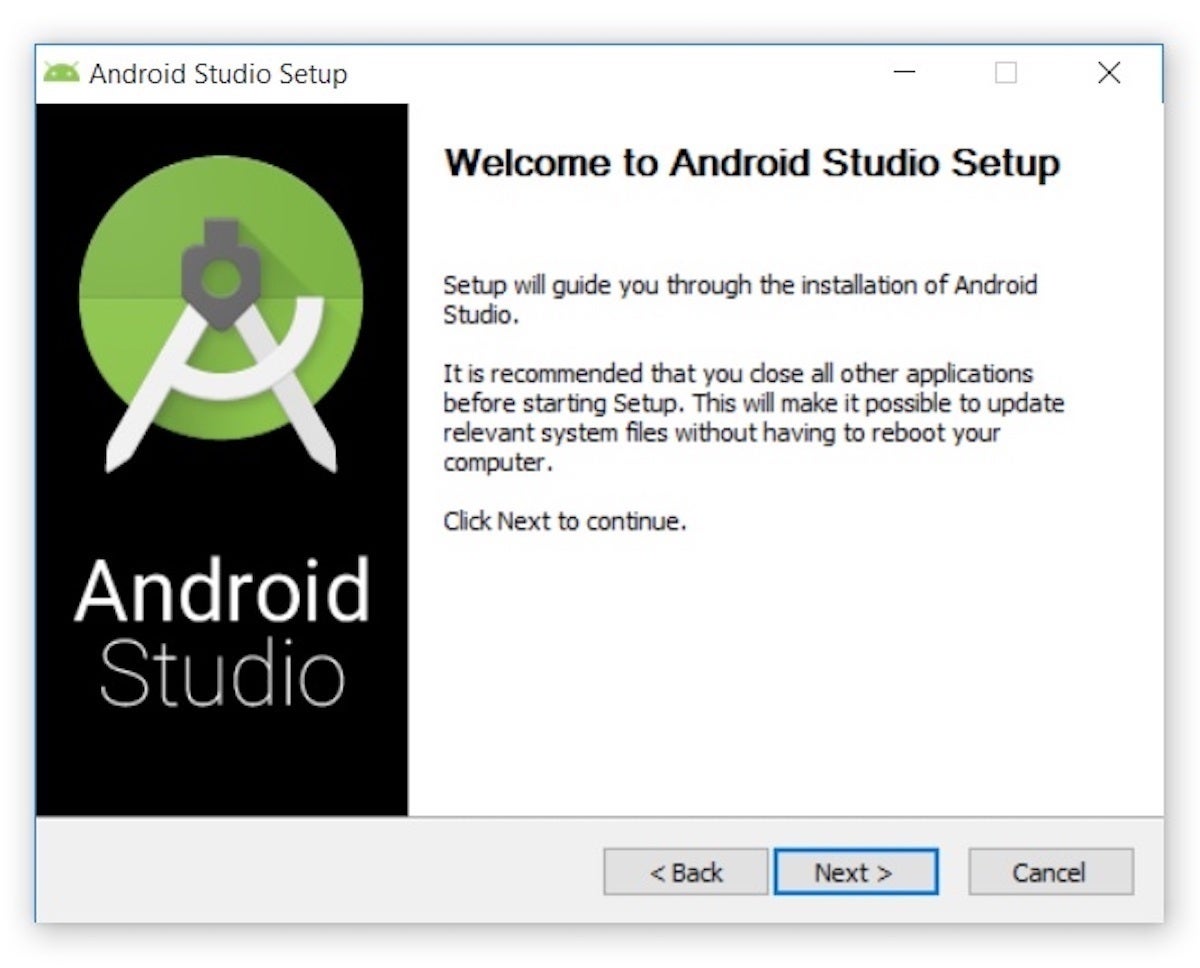
I launched android-studio-ide-181.5056338-windows.exe to start the installation process. The installer responded by presenting the Android Studio Setup dialog box shown in Figure 1.
 Jeff Friesen
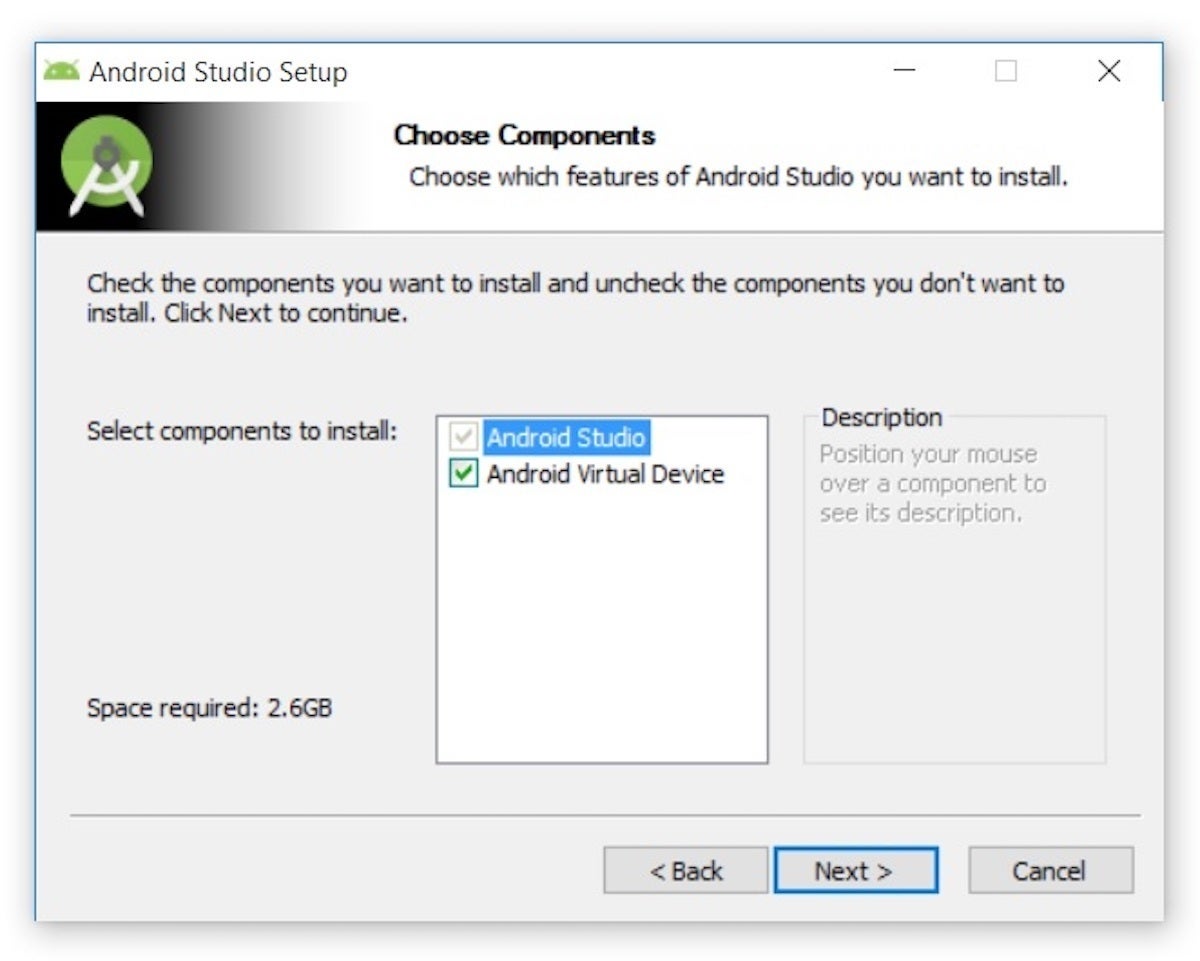
Clicking Next took me to the following panel, which provides the option to decline installing an Android Virtual Device (AVD).
 Jeff Friesen
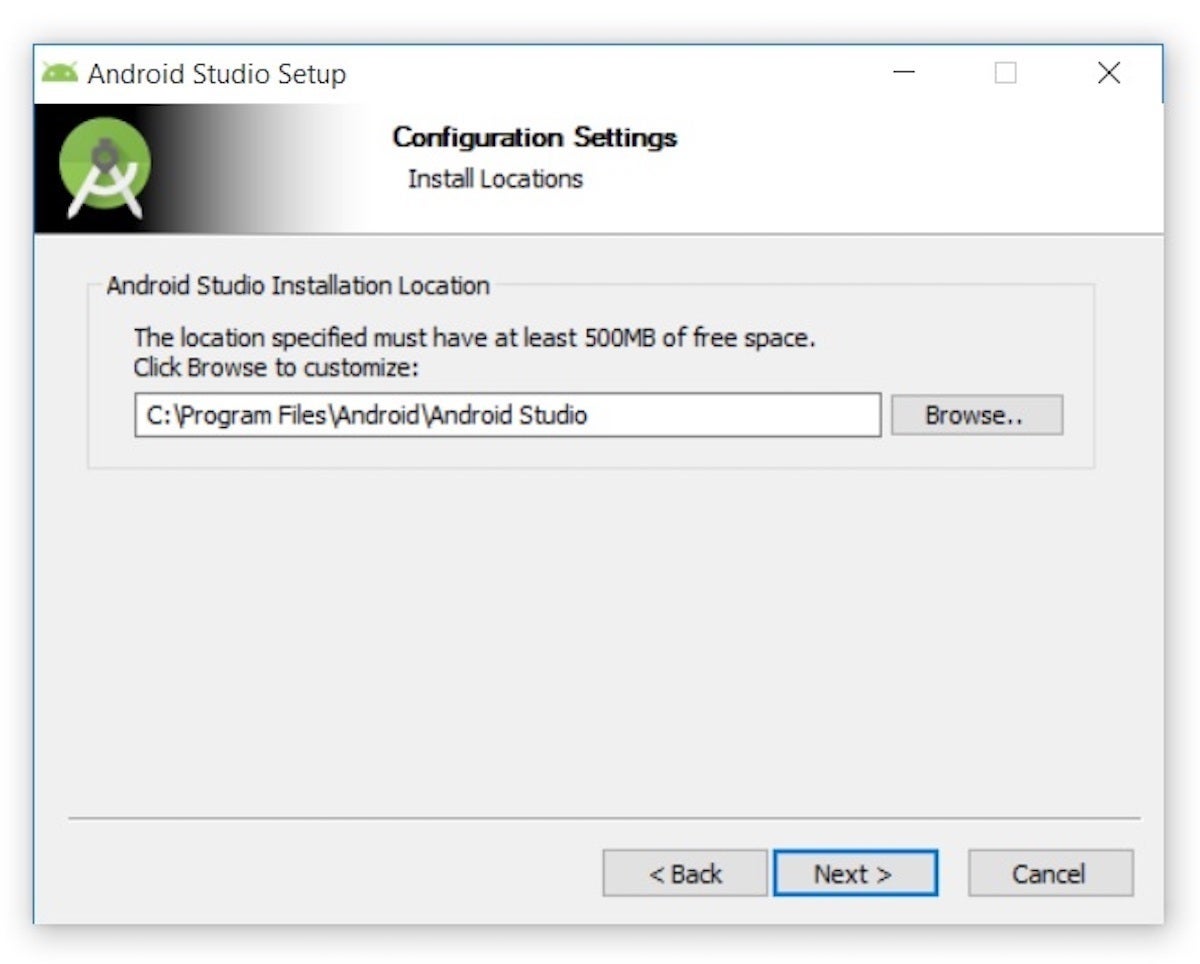
I chose to keep the default settings. After clicking Next, I was taken to the Configuration Settings panel, where I was asked to choose where to install Android Studio.
 Jeff Friesen
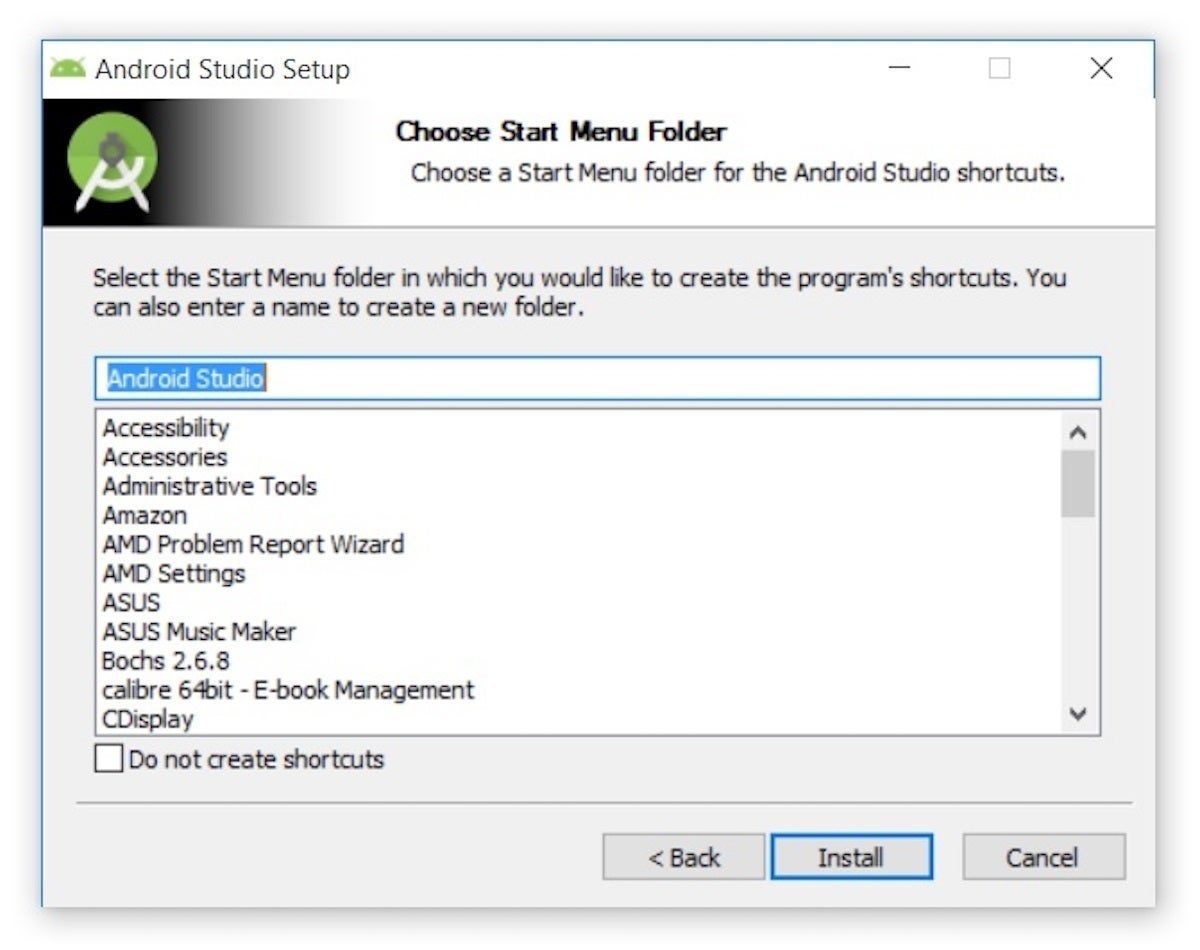
I kept the default installation location and clicked Next, and was greeted with the Choose Start Menu Folder panel.
 Jeff Friesen
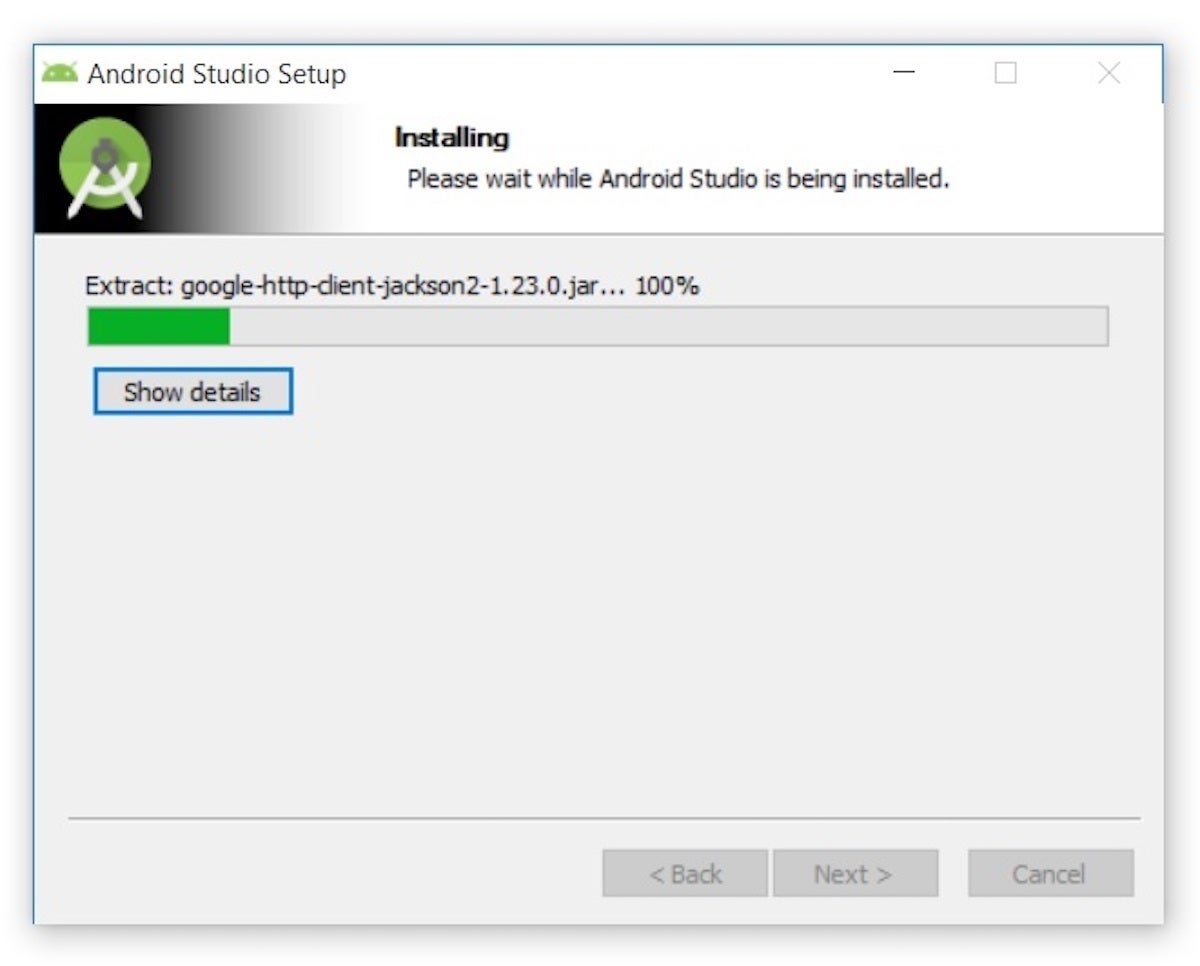
I kept the default setting and clicked Install. The following Installing panel appeared:
 Jeff Friesen
Clicking Show details causes the names of files being installed and other activities to be displayed. When installation finished, the Installation Complete panel appeared.
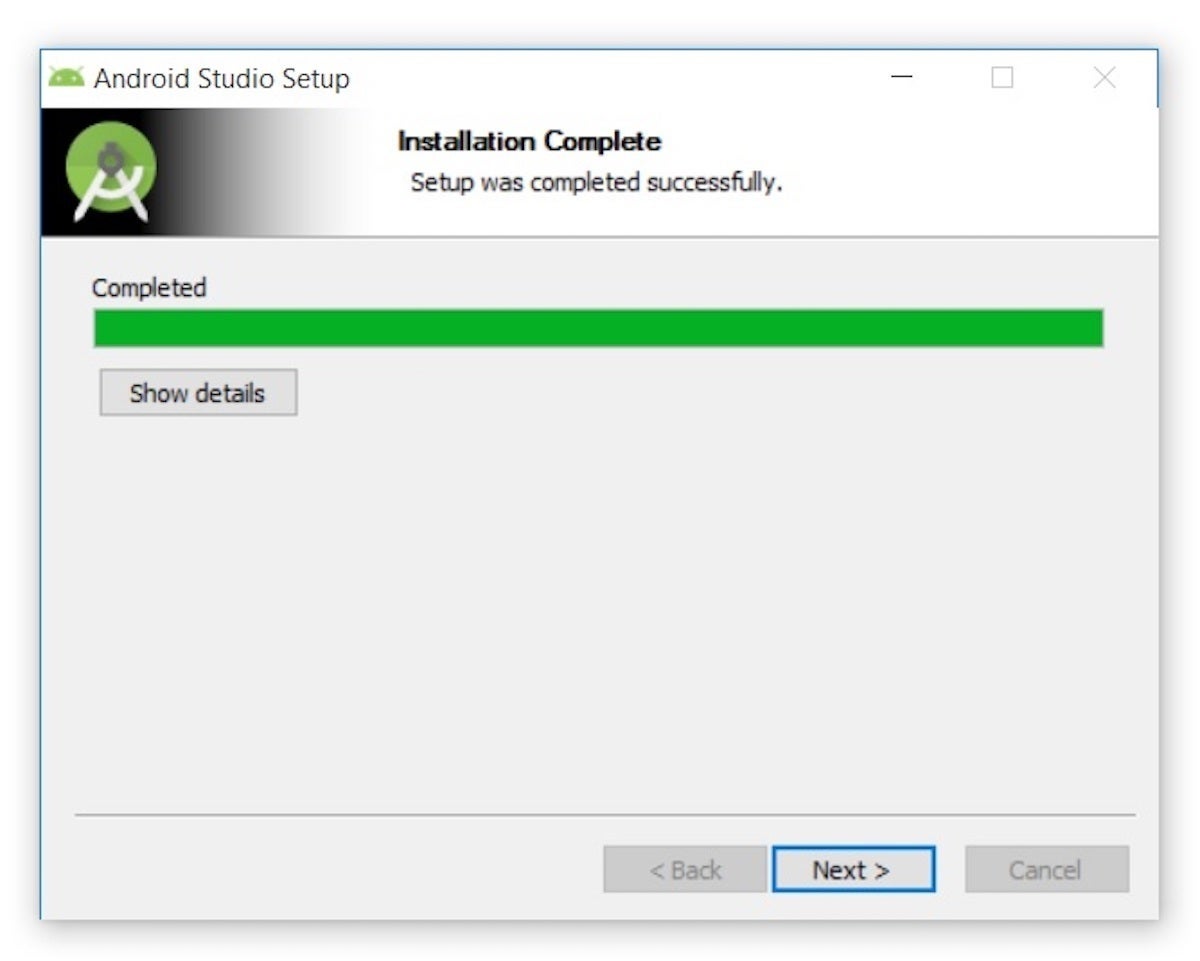 Jeff Friesen
After clicking Next, the installer presented the Completing Android Studio Setup panel.
 Jeff Friesen
To complete the installation, I left the Start Android Studio box checked and clicked Finish.
Running Android Studio
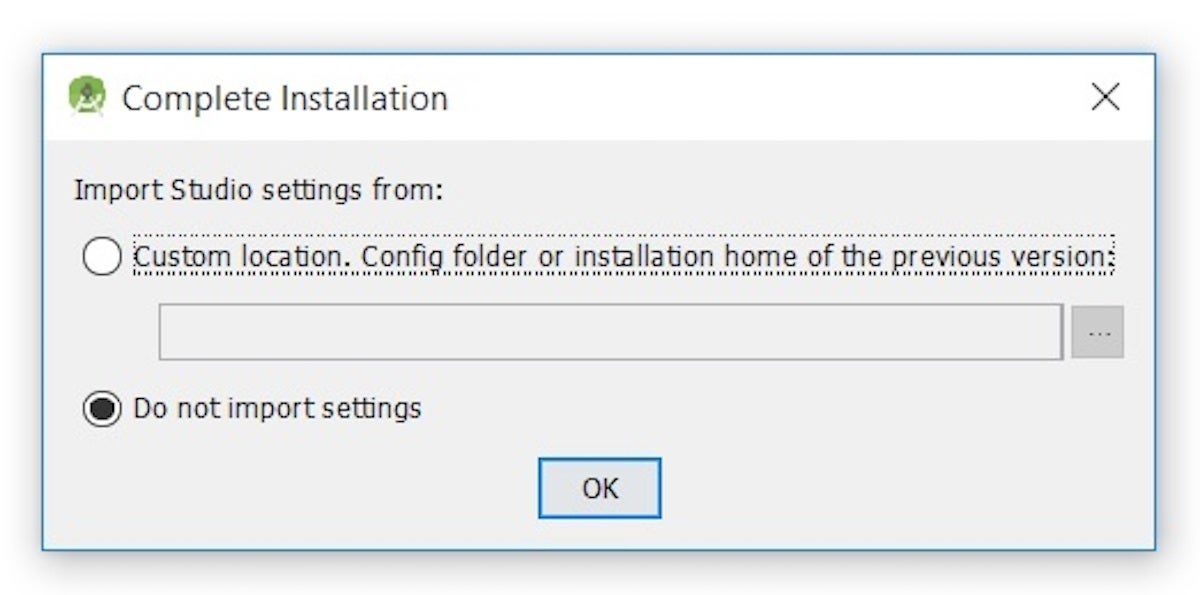
The first time Android Studio runs, it presents a Complete Installation dialog box that offers the option of importing settings from a previous installation.
 Jeff Friesen
I chose not to import settings (the default selection) and clicked OK, and was rewarded with the following splash screen:
 Jeff Friesen
I also observed the following Finding Available SDK Components message box.
 Jeff Friesen
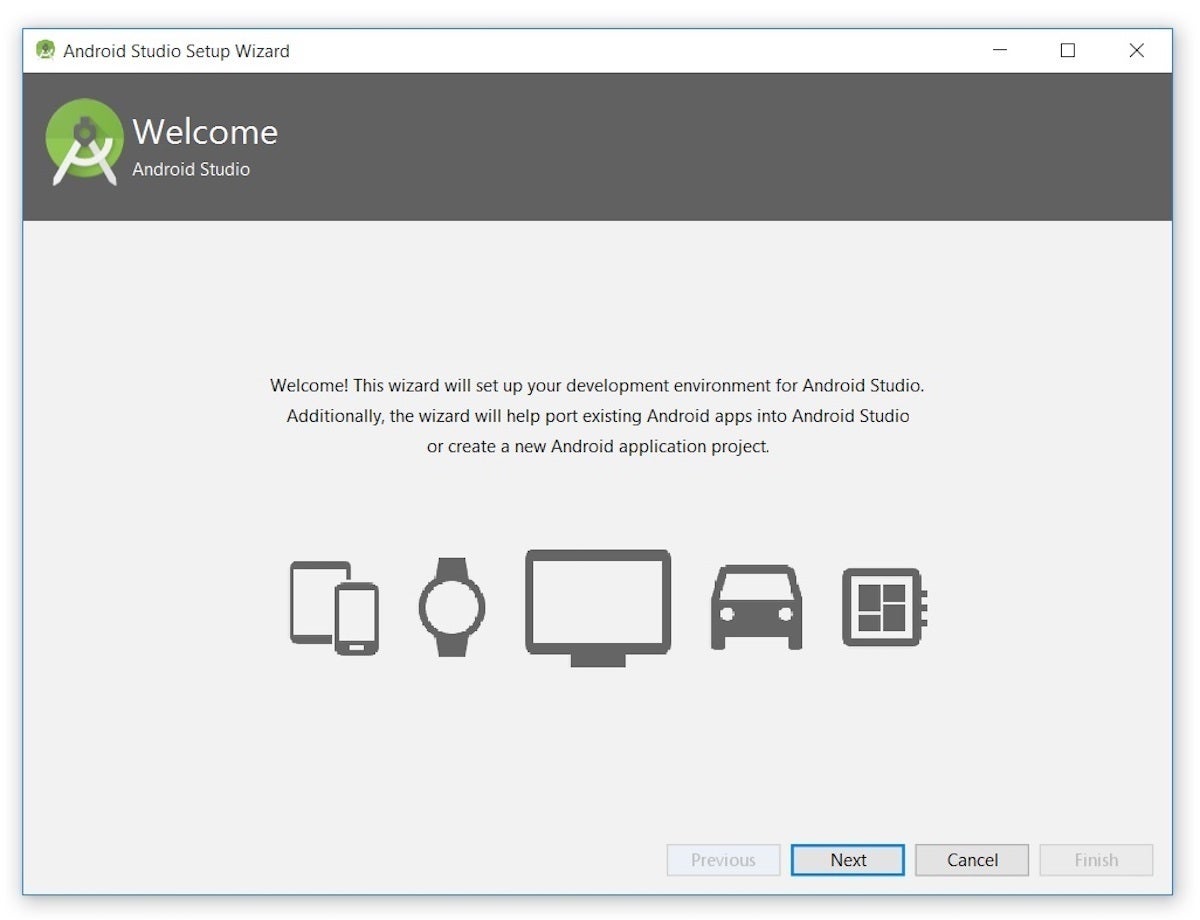
At this point, Android Studio presented the following Android Studio Setup Wizard dialog box:
 Jeff Friesen
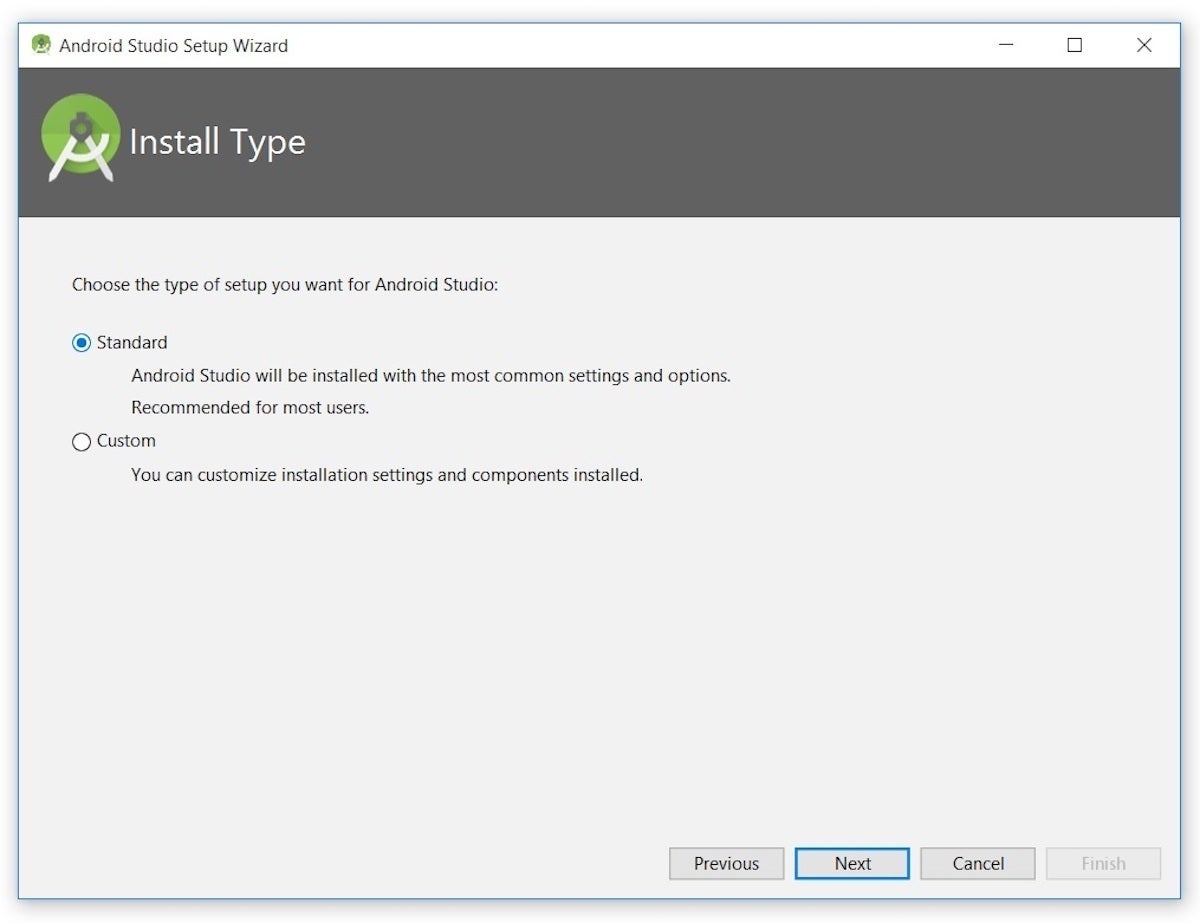
I clicked Next, and the wizard invited me to select an installation type. I kept the default standard setting.
 Jeff Friesen
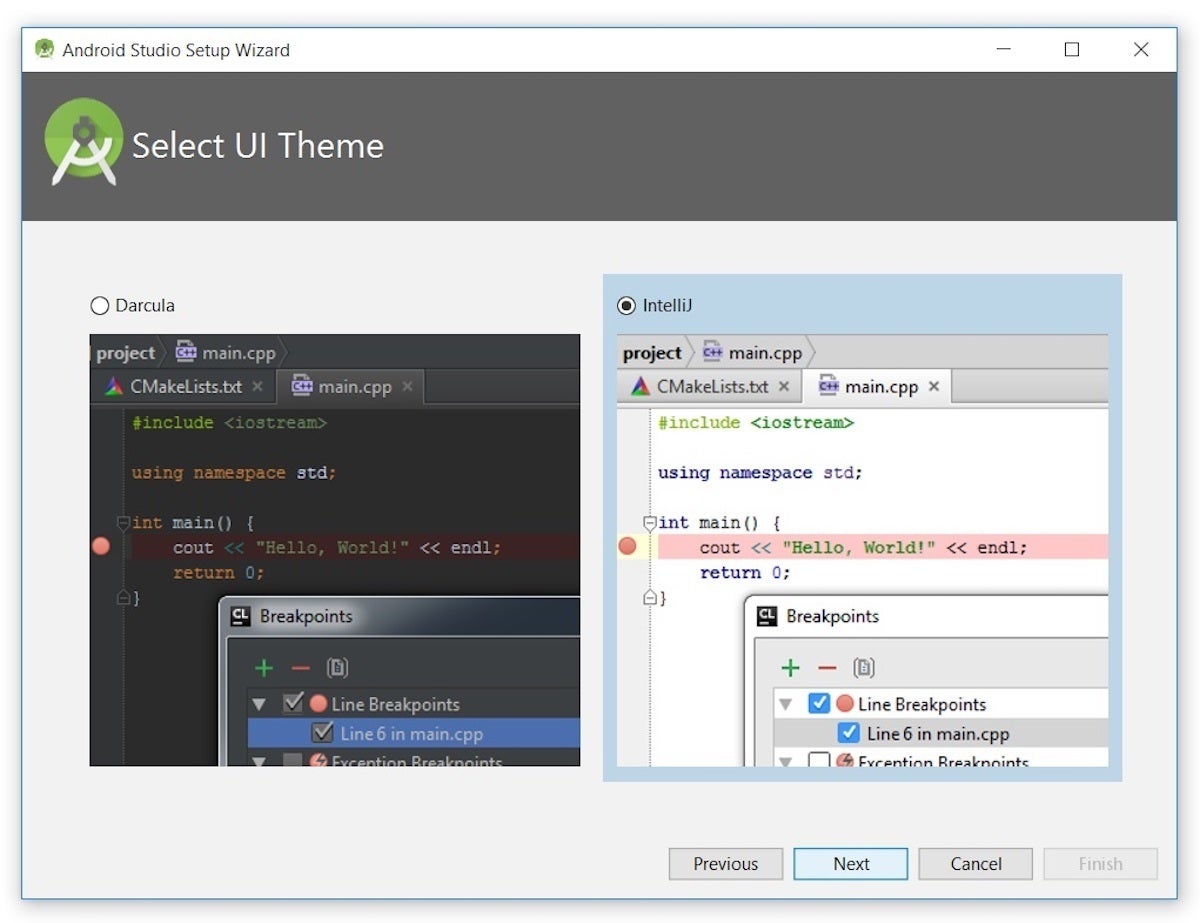
I was then given the opportunity to choose a user interface theme.
 Jeff Friesen
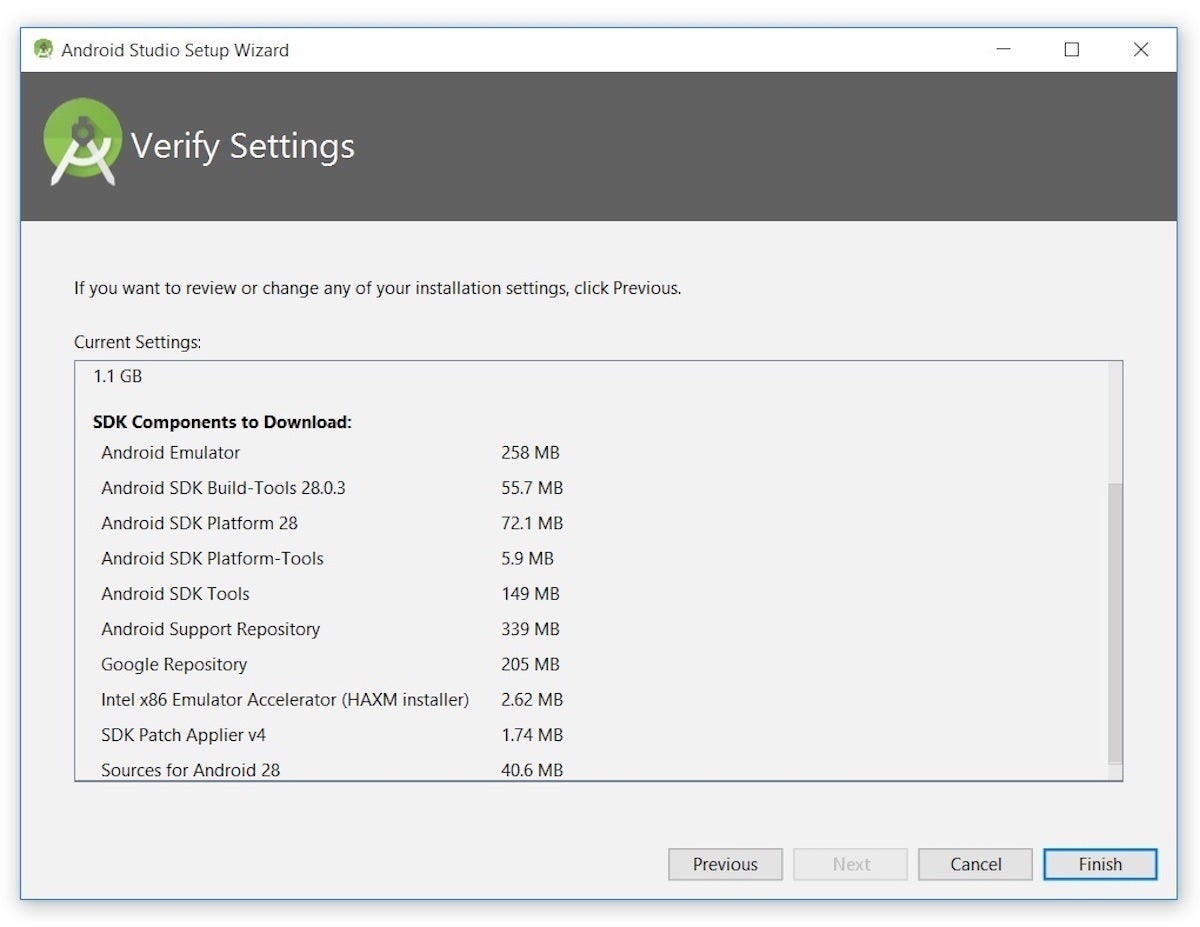
I kept the default IntelliJ setting and clicked Next. Android Studio next provided the opportunity to verify settings.
 Jeff Friesen
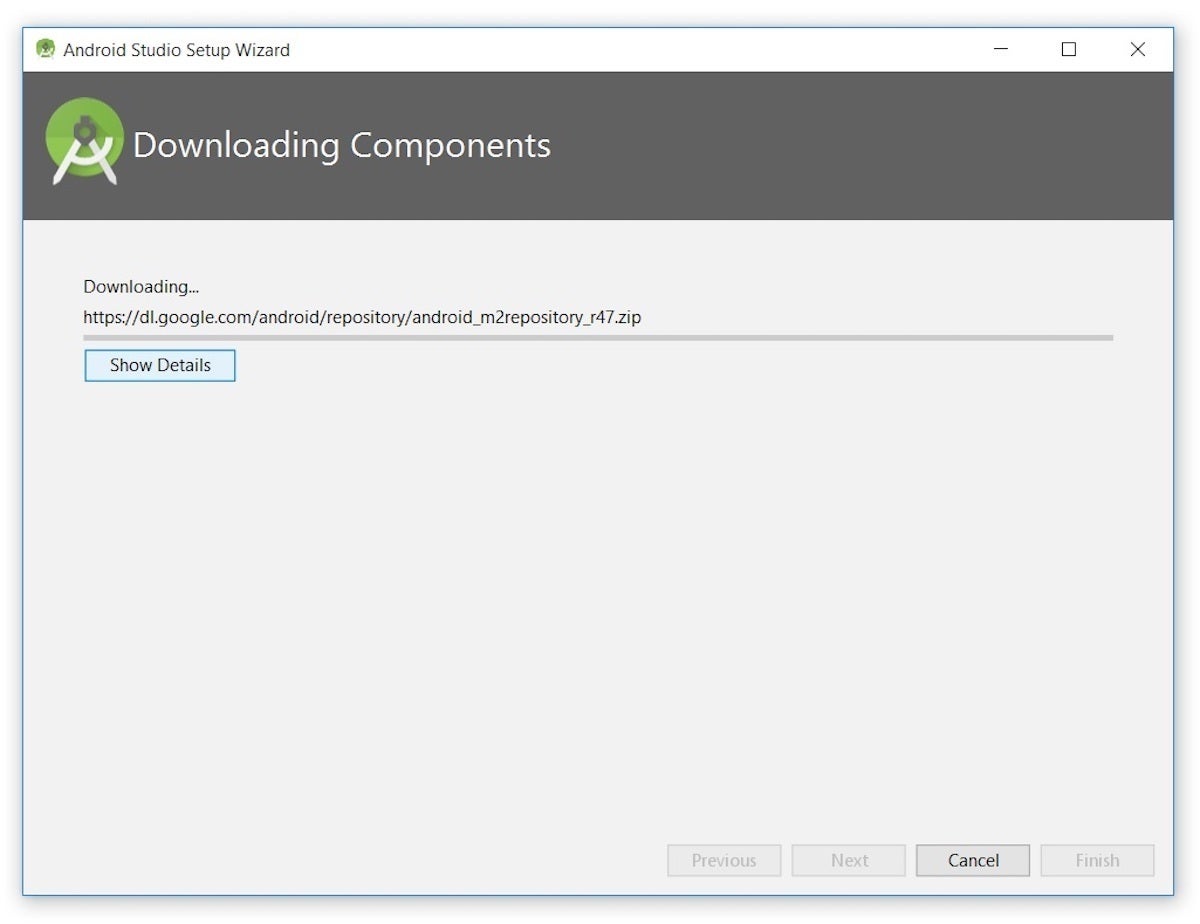
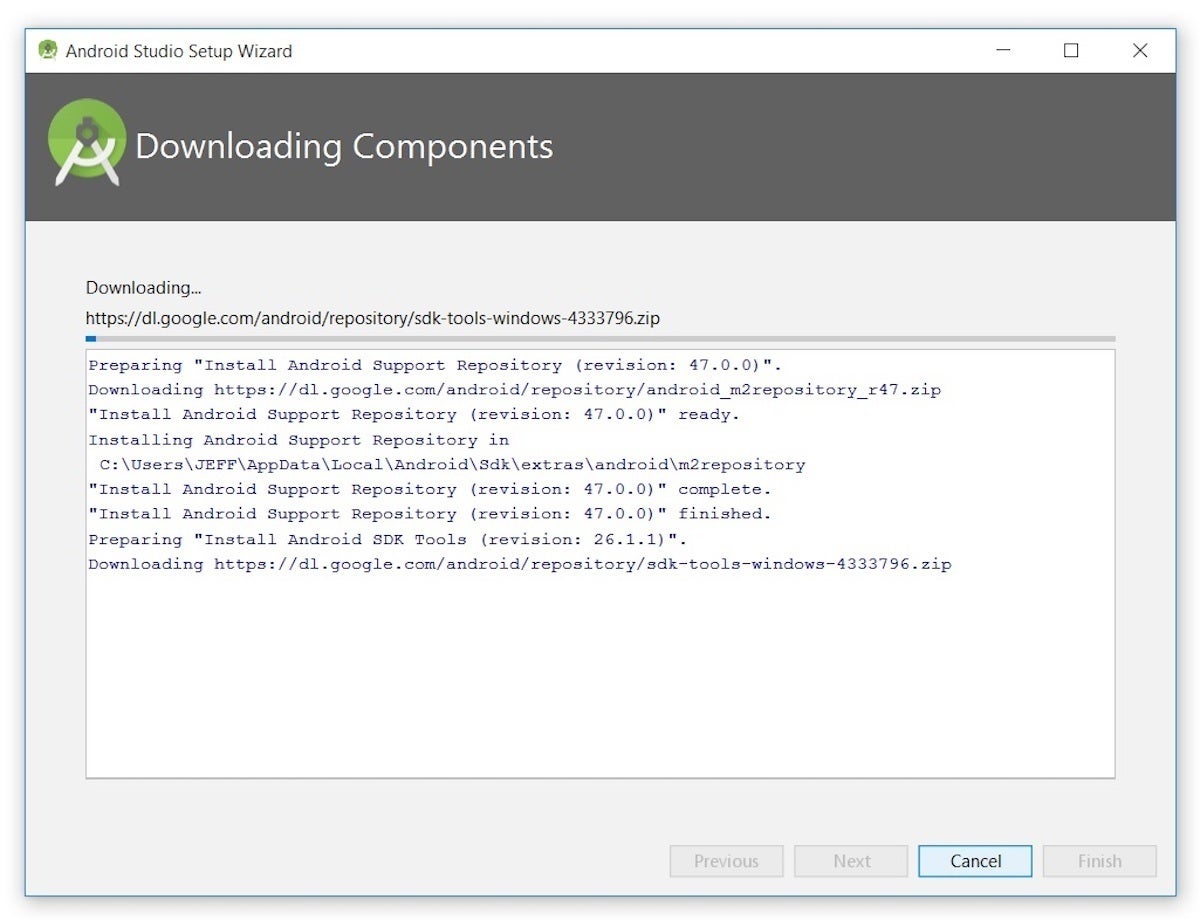
I clicked Finish and Android Studio began the process of downloading SDK components.
 Jeff Friesen
It can take several minutes for this part of the setup to finish. Clicking Show Details might relieve some boredom by revealing the various files being downloaded and unzipped.
 Jeff Friesen
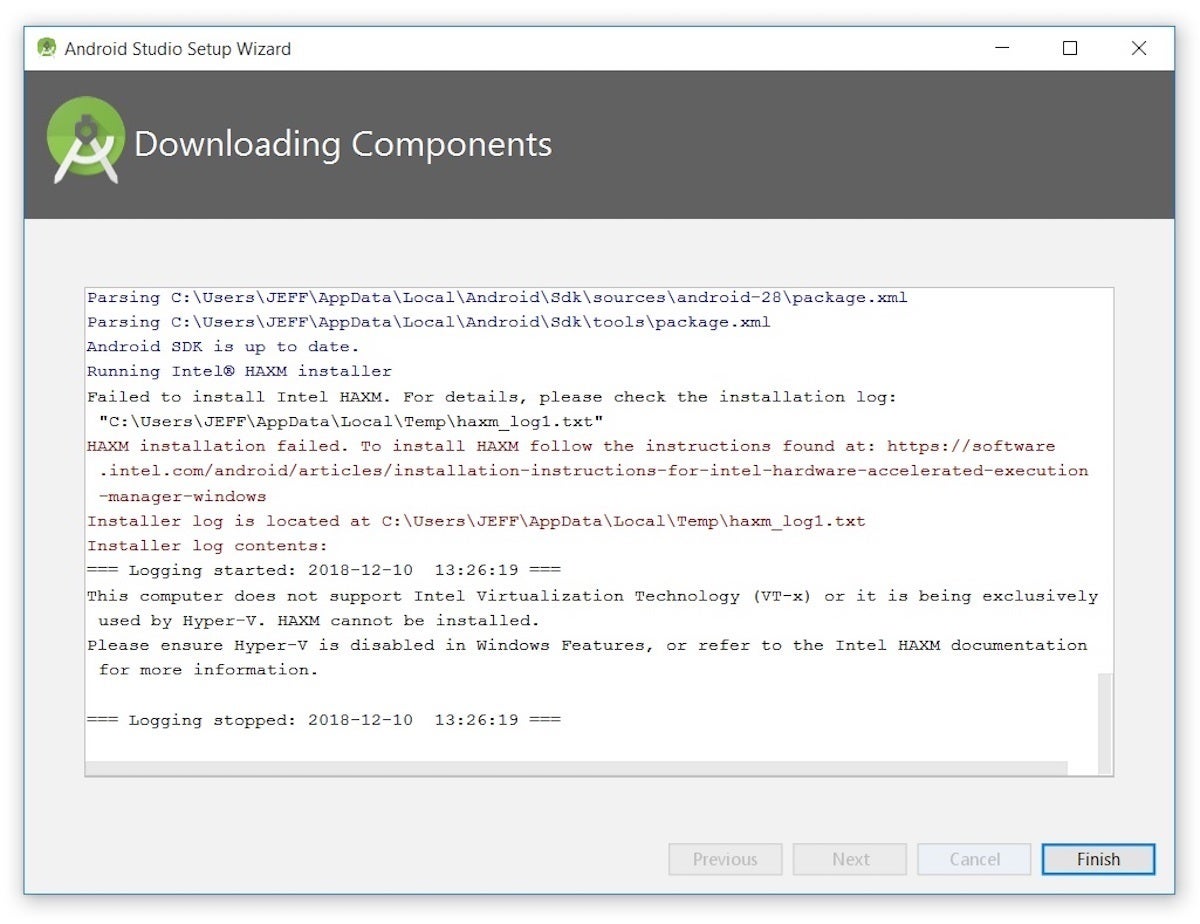
For my AMD-based computer, an unpleasant surprise awaited after the components had completely downloaded and unzipped:
 Jeff Friesen
My options are to either put up with the slow emulator or use an Android device to speed up development. In Part 3 I'll show you how I resolved this issue.
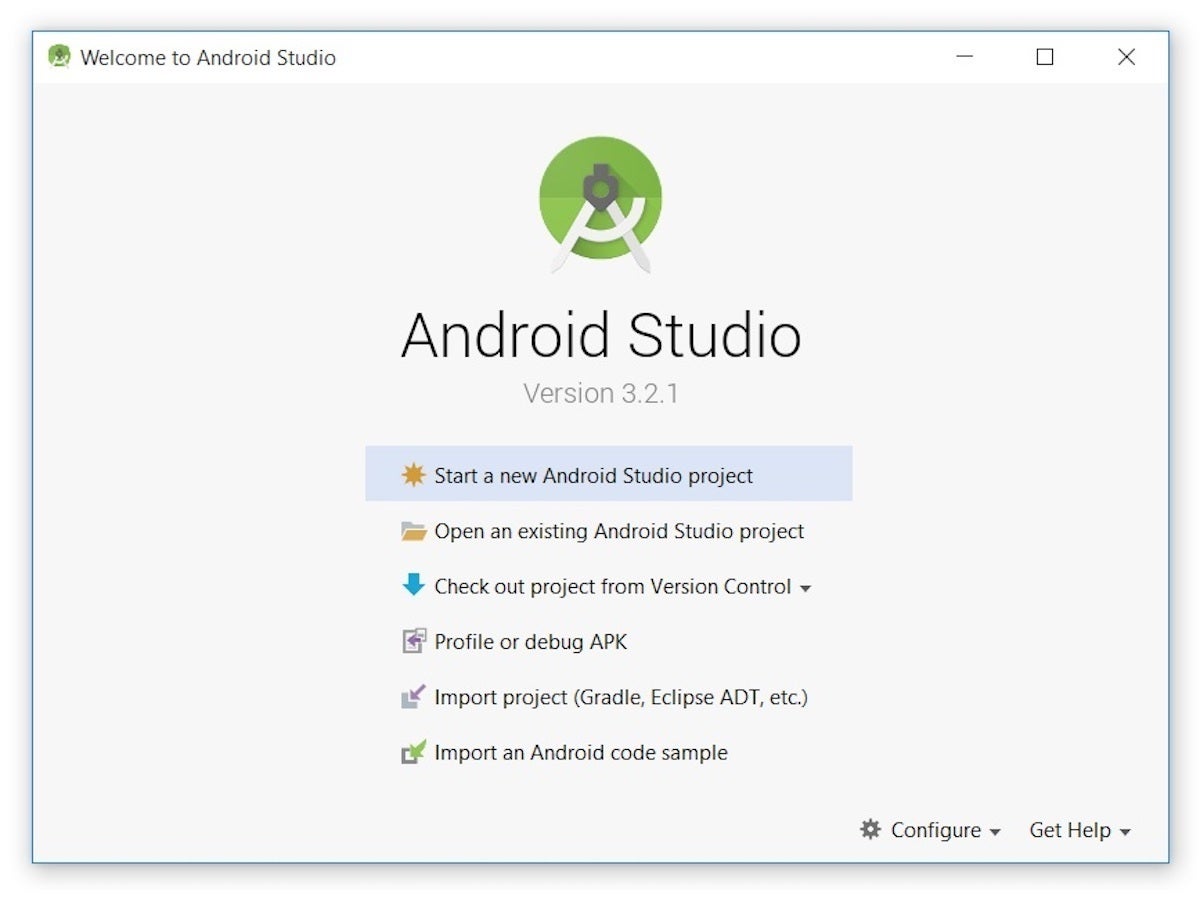
Finally, I clicked Finish to complete the wizard. The Welcome to Android Studio dialog box appeared.
 Jeff Friesen
This dialog box is used to start up a new Android Studio project, work with an existing project, and more. It can be accessed by selecting Android Studio from the Windows Start menu, or the equivalent on another platform.
Your first Android Studio mobile app
The quickest way to get to know Android Studio is to use it to develop an app. We'll start with a variation on the "Hello, World" application: a little mobile app that displays a "Welcome to Android" message.
In the steps that follow, you'll start a new Android Studio project and get to know the main window, including the editor window that you'll use to code the app in Part 2.
Starting a new project
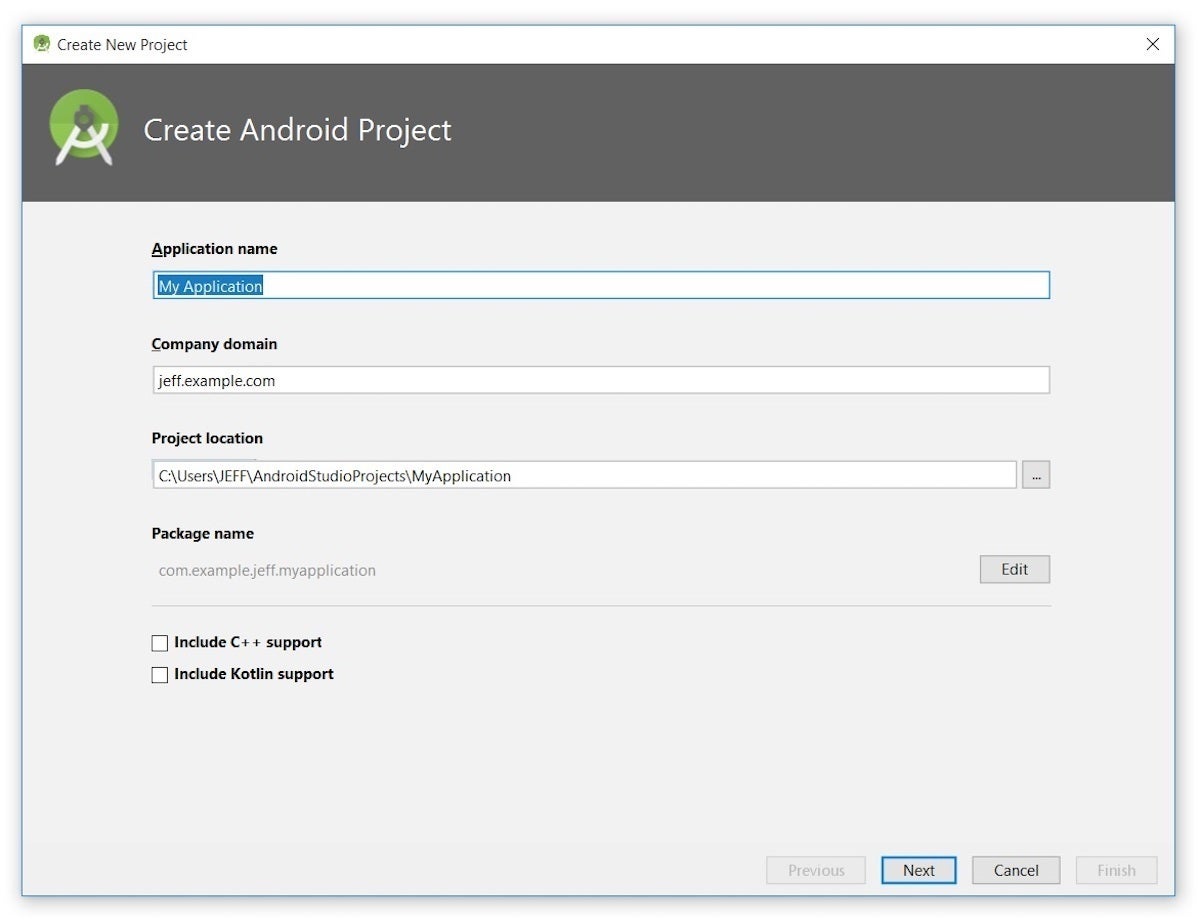
From our setup so far, you should still have Android Studio running with the Welcome to Android Studio dialog box. From here, click Start a new Android Studio project. Android Studio will respond with the Create New Project dialog box shown in Figure 19.
 Jeff Friesen
Enter W2A (Welcome to Android) as the application name and javajeff.ca as the company domain name. On my desktop, I observed C:\Users\JEFF\AndroidStudioProjects\W2A as the project location. Click Next to select your target devices.
 Jeff Friesen
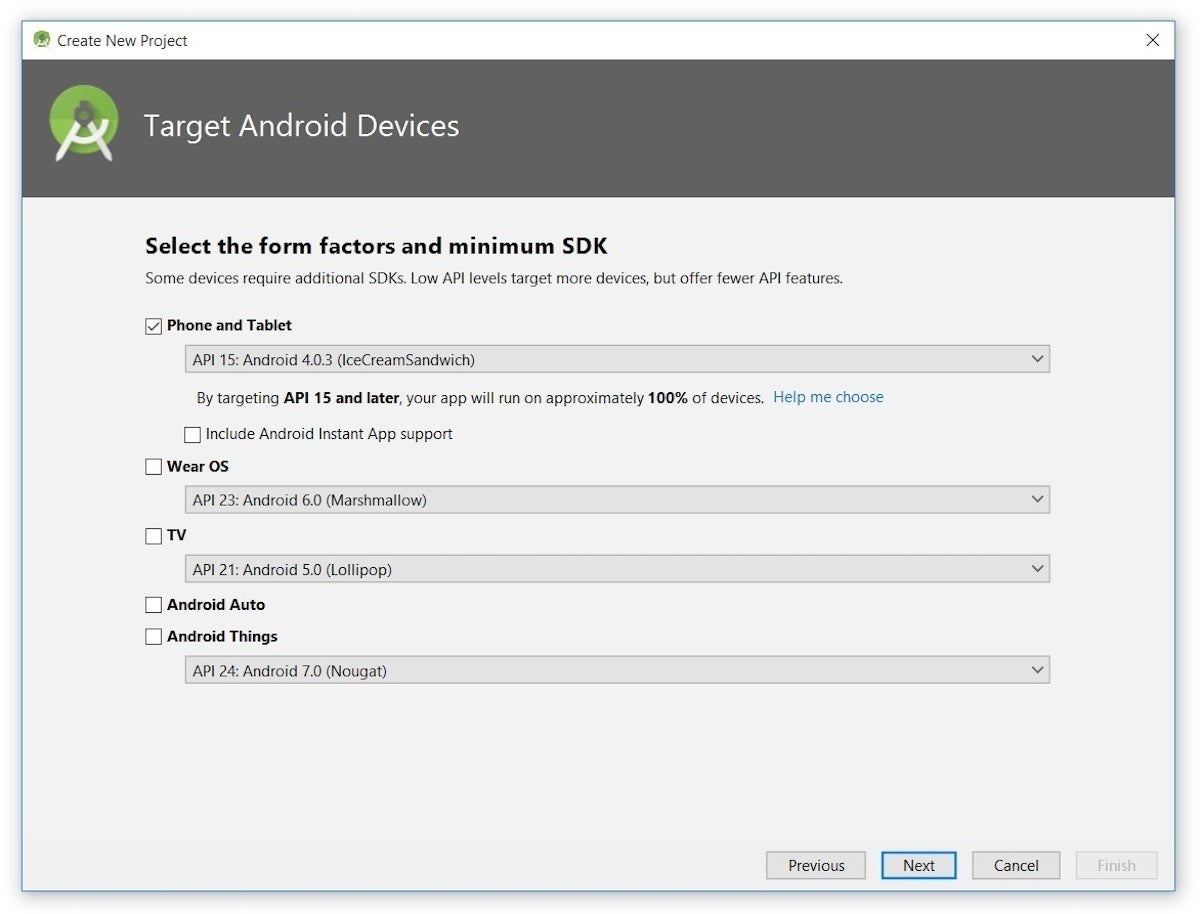
Android Studio lets you select form factors, or categories of target devices, for every app you create. I kept the default setting.
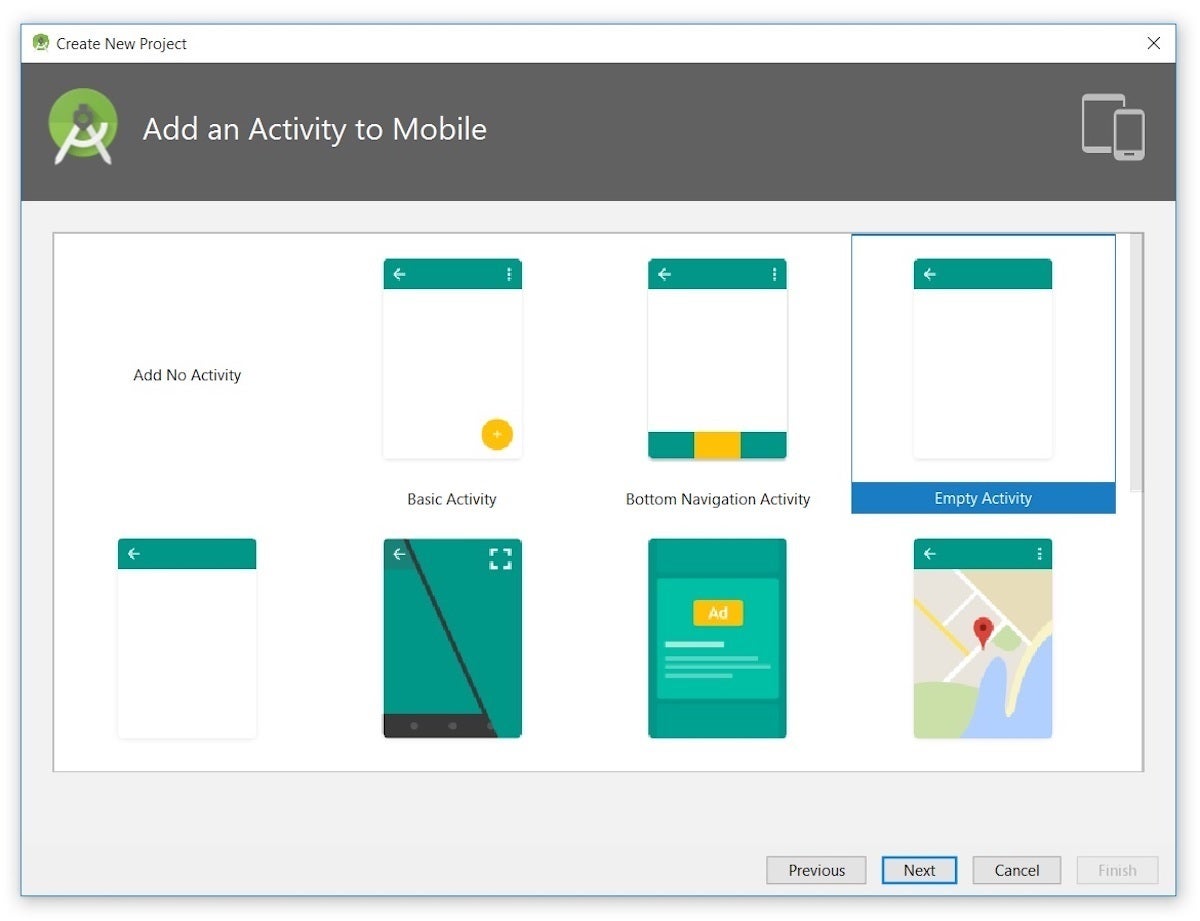
Click Next, and you will be given the opportunity to choose a template for your app's main activity. For now we'll stick with Empty Activity. Select this template (if necessary) and click Next.
 Jeff Friesen
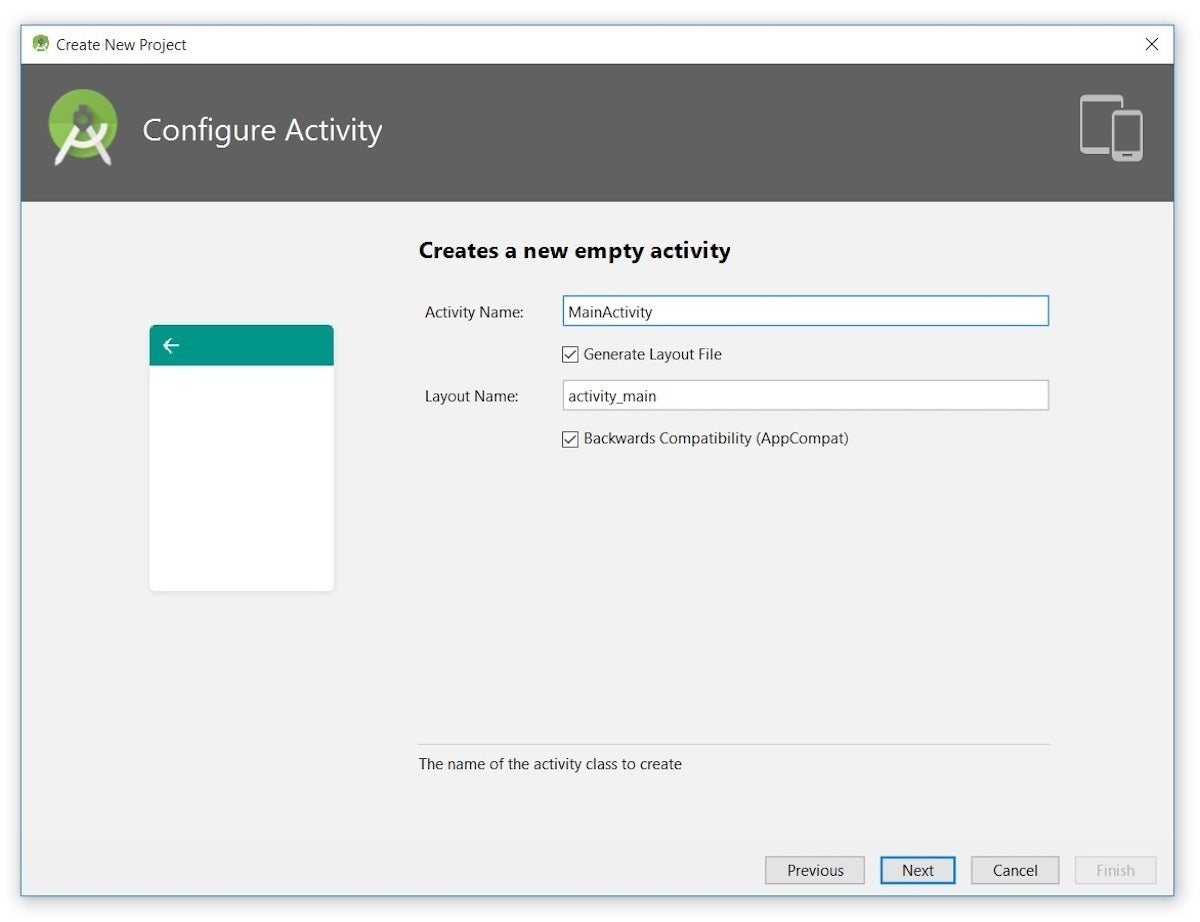
Next you'll customize the activity:
 Jeff Friesen
Enter W2A as the activity name and main as the layout name, and click Next to complete this step.
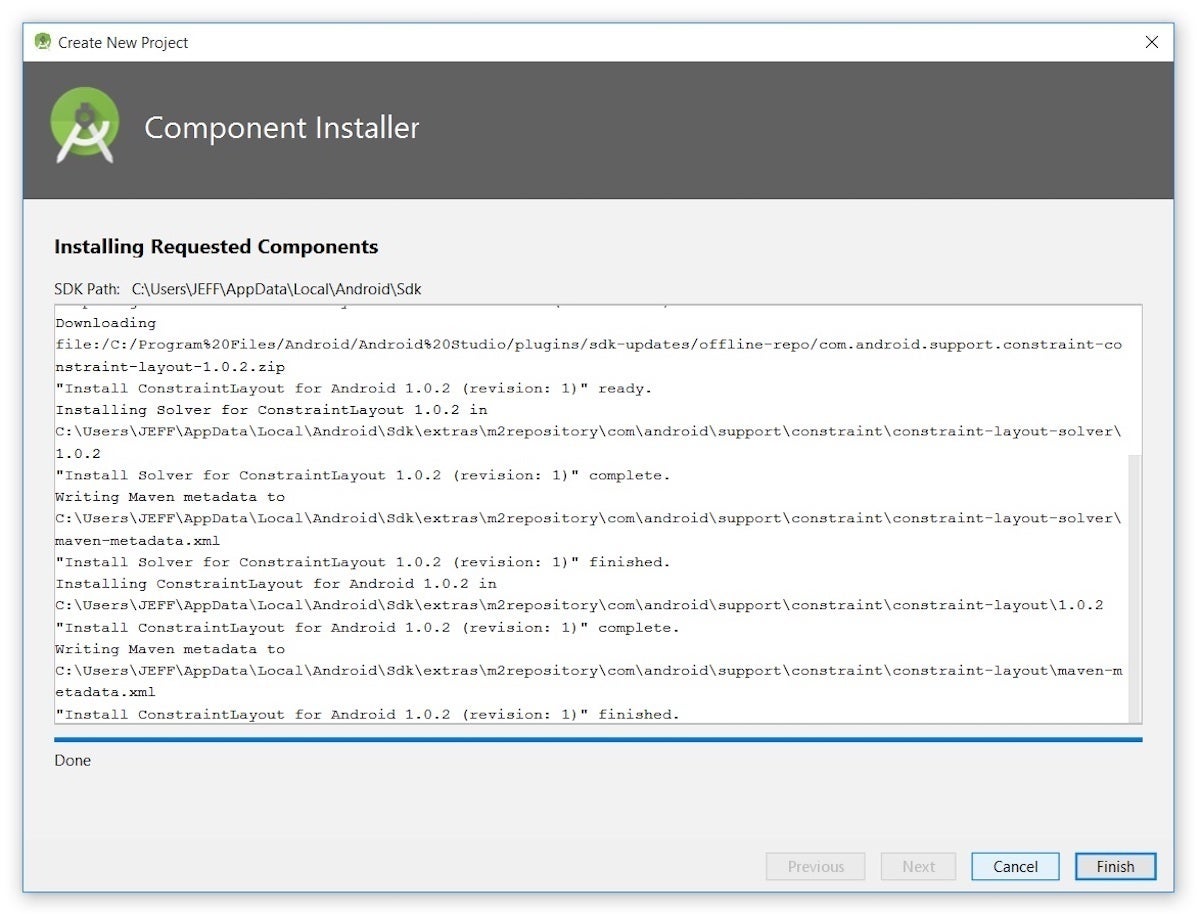
The first time you use Android Studio, you'll discover that it has to download some files related to its constraint layout, which is used to build responsive user interfaces:
 Jeff Friesen
Android Studio enables Finish after downloading the constraint layout files. Click this button and Android Studio takes you to the main window.
 Jeff Friesen
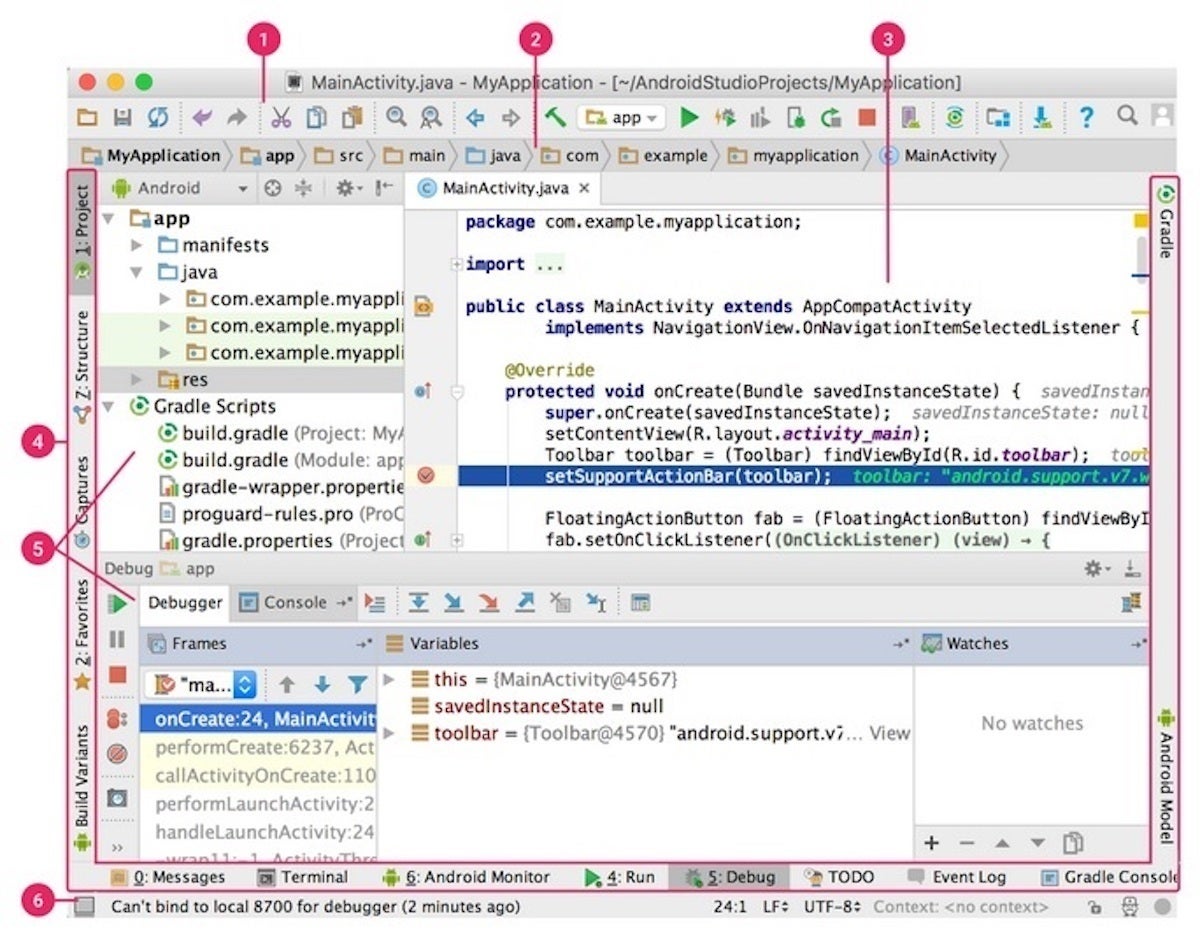
The main window is divided into a menu bar and several other areas, which are identified in Figures 25 and 26. (Note that Figures 25 and 26 are courtesy of Google.)
 Jeff Friesen
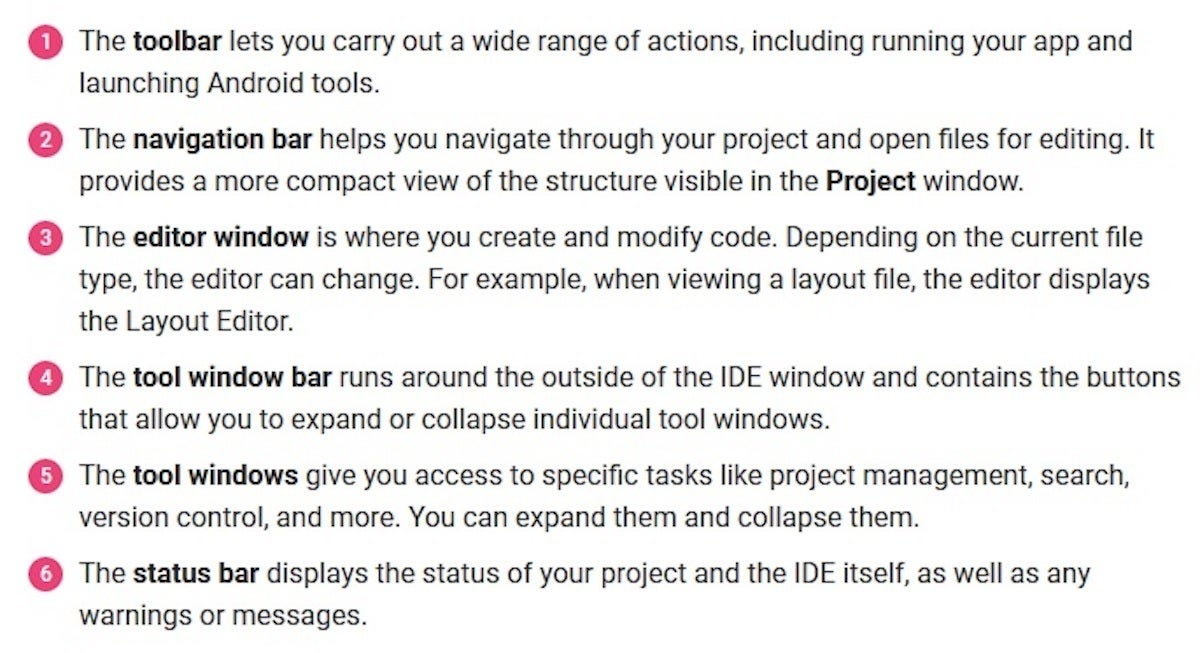 Jeff Friesen
Check out the Meet Android Studio page to learn more about Android Studio's user interface.
The Project and editor windows
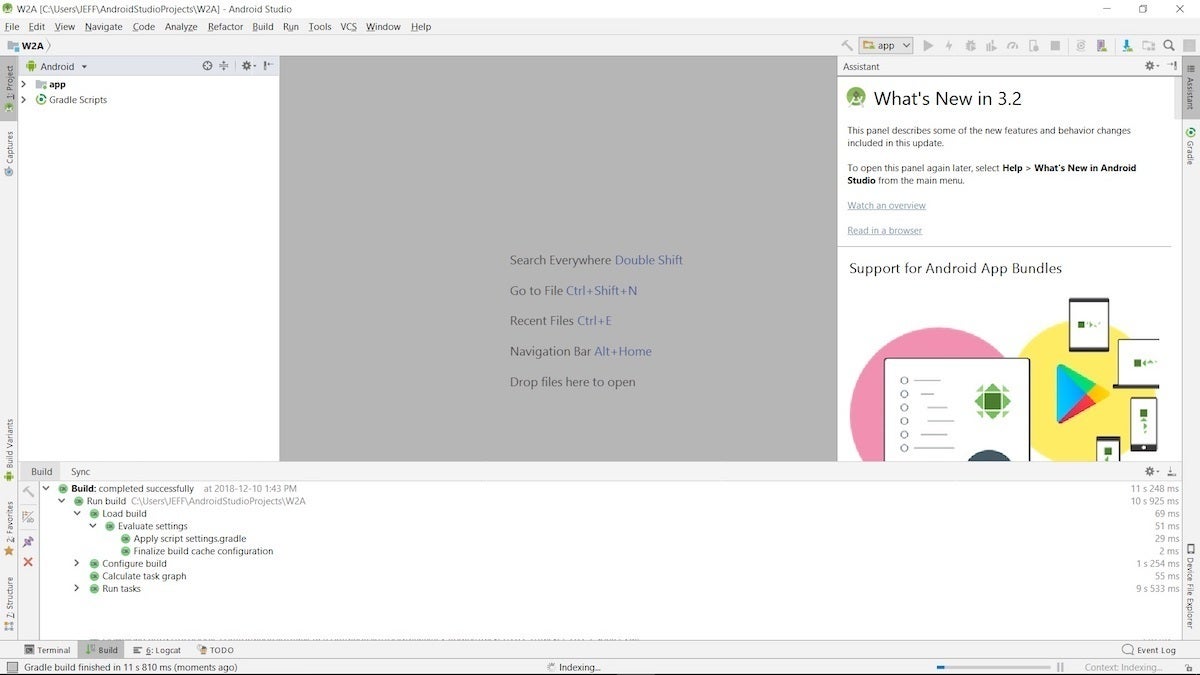
When you enter the main window (see Figure 24), you observe the Project window showing only app and Gradle Scripts. You'll have to expand the app branch of the project tree to observe more details.
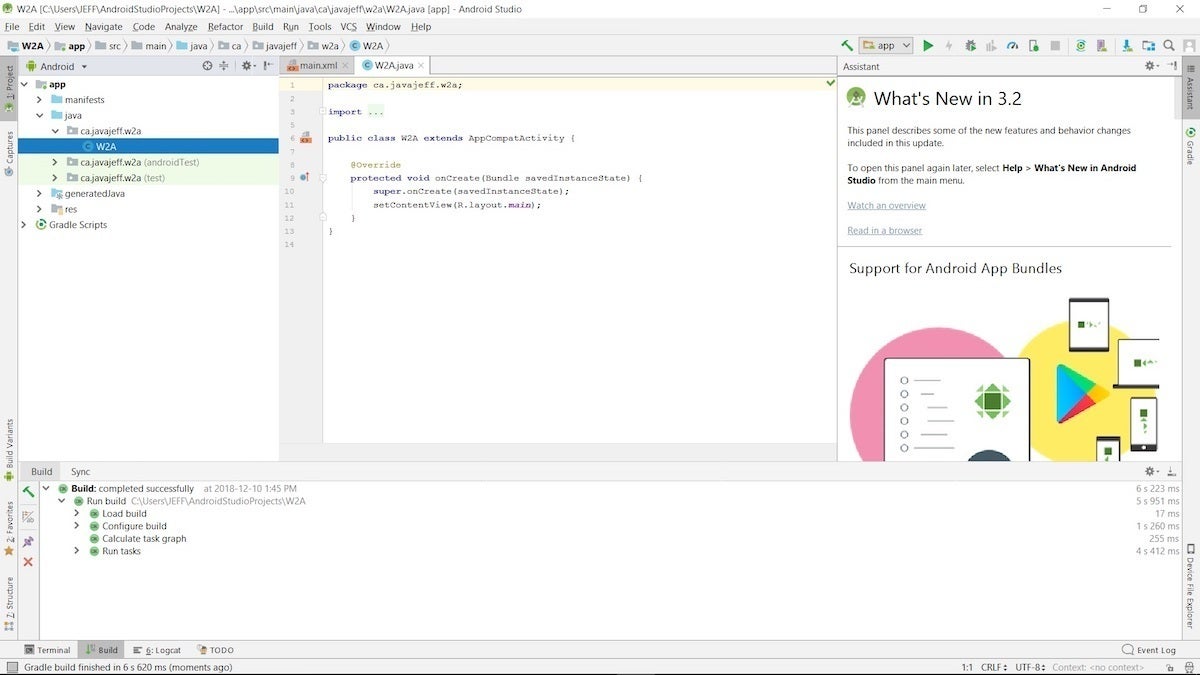 Jeff Friesen
The Project window is organized into a tree whose main branches are app and Gradle Scripts. The app branch is further organized into manifests, java, generatedJava, and res subbranches:
- manifests stores
AndroidManifest.xml, which is an XML file that describes the structure of an Android app. This file also records permission settings (where applicable) and other details about the app. - java stores an app's Java source files according to a package hierarchy, which is
ca.javajeff.w2ain this example. It also organizes files for testing purposes. - res stores an app's resource files, which are organized into drawable, layout, mipmap, and values subbranches:
- drawable is a mostly empty location in which to store an app's artwork; initially, the XML files for the launcher foreground and background adaptive icons are stored here.
- layout is a location containing an app's layout files;
main.xml(the main activity's layout file) is initially stored here. - mipmap is a location containing various
ic_launcher.pngfiles, which store launcher screen icons of different resolutions. - values is a location containing
colors.xml,strings.xml, andstyles.xml.
The Gradle Scripts branch identifies various .gradle (such as build.gradle) and .properties (such as local.properties) files that are used by Android Studio's Gradle-based build system.
source:InfoWorld


